Starting a blog and making money from it can sound pretty intimidating, especially if you are a complete beginner and have no technical background.
No need to worry! This blog post will guide you through the detailed step-by-step process to help you get your blog up and running without you having to do any complicated coding or fancy technical stuff. It also shows you various methods to make money from blogging. All you need to do is to sit back, relax, follow the tutorial, and with a few clicks, you can start your blogging journey and become wonderful!
Why you should start blogging
Whether you are an entrepreneur finding a way to market your product or a person who wants to start an online business and make money, blogging is probably precisely what you are seeking.
Blogging is becoming more and more popular, and it is an easy and inexpensive way to communicate and express yourself with the world. Many entrepreneurs and even big companies use blogs to keep their customers informed with their latest products or services and build a loyal community.
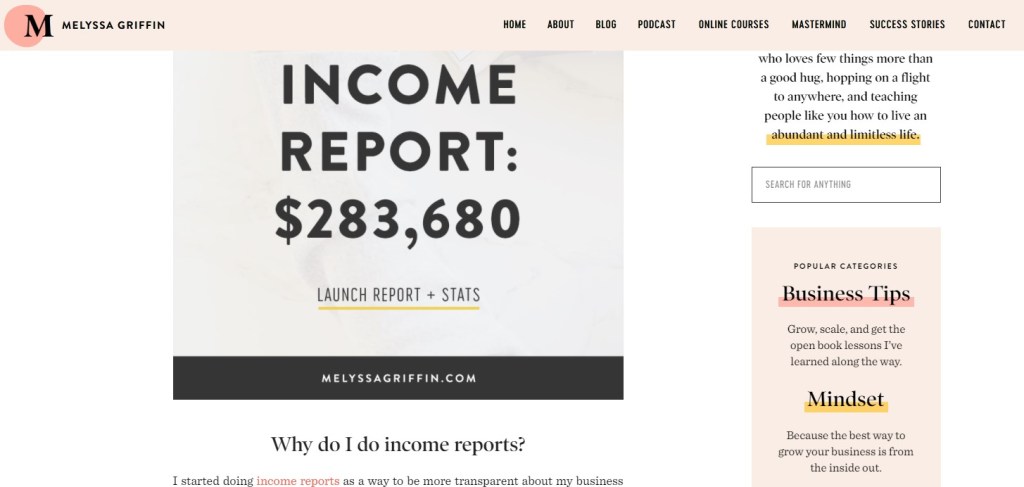
Besides, blogging can become a full-time job and generate a reliable income source if done correctly. Numerous bloggers, for example, Pinch Of Yum and Melyssa Griffin, were able to turn blogging into a stable online business, work on it entirely, and make thousands of dollars in revenue per month consistently by blogging.
Even if you are not interested in starting a blog to make money and just want to do it for fun, blogging can help you gain confidence in your writing and communication skills. Just write a post about anything, hit the publish button, ask others for their opinions, and with their feedback, you will gradually become much much better at those.
What is the requirement to start a successful blog?
“Content is king.”
Bill Gates
As Bill Gates once said, “Content is king,” and it holds very true for blogging. Blogging, at its core, is all about sharing your knowledge and experience with others.
Although being a great writer or an expert in a specific field might be beneficial when starting a blog, you do not need to be either one of those to be successful. All you need to have is a passion (or an interest) for your topic, commitment, and your own way of telling about it.
People want to read stuff that they find genuine and exciting, not superior knowledge in an essay. No need to worry if you are just a beginner. Your experience is unique, so just be yourself and write in your own way. You will be fine.

Besides passion, a clear goal is another important factor that significantly affects how successful your blog is.
Everyone has their reason when creating a blog, for instance, improving public images, sharing knowledge, building a community, or making money. Thus, they have their own definition of a successful blog. So before starting a blog, ask yourself a question: what is the objective of your blog?

With the help of various platforms and services, starting a blog is no longer an intimidating experience. With a little bit of guidance, everyone can start creating their own blog and writing anytime and anywhere.
The rest of this blog post will guide you through the detailed step-by-step process it takes to help you start your first blog as quickly and successfully as possible.
Note that this guide might not be suitable for you if you are looking to create a completely free blog. There are millions of bloggers these days, and they are also trying their best to be successful. Of course, if you are a talented writer, you can be successful with a free blog just fine. Even so, investing a little bit of money upfront can go a long way since you will have full control over your blog. Furthermore, you have full access to versatile tools, services, and supports to help you stand out.
How to start a successful blog
Here are the 11 steps you need to do to start a successful blog and make money from it.
1. Research blog topics (or niches) and choose a profitable one
A topic or niche is an area that your blog content will focus around. Some of the most popular niches are food, fashion, personal finance, online business, and blogging.
Because your niche decides the entire content of your blog, it should be the first thing you care about. You should choose one that you’re familiar with and enjoy writing. For example, a fitness blog can be the right choice for people who love working out.
However, not every niche is the same. Some are popular than others. If you pick one that is too narrow, you can have a hard time finding the right audience for your blog and make money from it.
One of the best ways to come up with the best blog niche that suits you is to brainstorm any idea you have in mind and list it out. Just think about anything you like, working out, learning, traveling, food, cooking, home decoration, cat, dog, shopping, photographer, anything. Then, check the popularity for each of them by doing a quick google search.

A high number of search results is a good indicator of a popular niche.
Also, don’t be too afraid if there are many competitors. The internet is a big place, and there will always be people that resonate with your experience. Furthermore, in blogging space, competitors aren’t necessarily your enemy. Rather, they are your friend. If you have good content and your competitors find it useful to their own audience, they might backlink to your blog. Ultimately, it is a win-win situation.
Another crucial factor in finding your profitable blog niche is to check for possible monetization models.
A monetization model is a method that a business uses to make money. Some of the most popular monetization models for blogs are displaying ads, affiliate marketing, writing sponsored posts, or offering online courses.

A niche with various monetization models means that you have the opportunity to diversify your sources of income and make more money from your blog.
So, should you choose a blog topic that you are not interested in but can make a lot of money?
Well, at the end of the day, nothing is right for everyone. The recommendation in this blog post is merely general guidance to increase your chance of success. If you are confident that you can write about an unfamiliar topic, go ahead. Just remind yourself that you might struggle to keep up the good work in the future.
In conclusion, before starting a blog, make sure your niche is broad enough, the monetization potential is good, and most importantly, the more you love a topic, the better it is.
2. Pick a great name for your blog
The name of your blog should be the same as what appears in the website bar. So when refers to a blog’s name, people usually refer to your domain name.
Unless you intend to create a personal brand like Google or Amazon, your blog’s name should be somewhat related to your topic. People see your domain name and expect that your blog content is what they think it is.
The more descriptive and memorable, the better it is. 2-3 words usually are the best. You also don’t need to go all out and find a creative name. It just needs to be memorable so people can easily remember and search for it.
Avoid using numbers or even hyphens for your domain name, if possible. They make your domain name look unprofessional.
The .com is the most popular and recognizable extension, so you should go with it. However, other extensions like .org, .io, .net,.. are also fine. They are not as popular but still look trustworthy enough. Suppose you find a domain name that you really love, for example, coffeelover.com, has already been taken. You can go with coffelover.net or coffeelover.io instead. There are countless successful blogs out there than has the domain name extension .org, .net. Therefore, don’t worry too much about it. For example, google.blog is the official blog of Google.
Similar to choosing your blog niche, write down everything you have in mind for your blog name. Pick one that you find the most appropriate and love the most.
Using Therasus is also a method to come up with a blog name. For example, if you love the name “thecleverbusiness.com,” but it has been taken, try a synonym for the word “clever” or “business” is a good way to go. It could be something like “thesmartbusiness.com” or “thecleverstartup.com.” It’s up to you to decide.
Don’t be afraid if you accidentally make a mistake. You can always change your domain name later.
It’s also important to note that even though having a great name is good, your blog’s content is always what defines your blog. Even if you go with your personal name, but you have great content, search engines will still recommend your blog. Furthermore, people don’t really care about the name of your blog that much. The most important thing for them is what they can learn from your blog. So, don’t get too hung up on your domain name.
3. Choose a good blogging software
One of the best blogging platforms to use is WordPress. It is a CMS (Content Manager System) that has been around for a very long time and powers more than 30% of entire online websites. Many web hosting services also support one-click installed WordPress as part of their hosting plan.
WordPress allows you to customize your blog as you want. You also have full access to various free tools and services to build your blog faster and easier.
It’s important to note that when people refer to WordPress alone, they mostly refer to WordPress.org, not WordPress.com. There are many differences between WordPress.com and WordPress.org that you might have to consider.
Firstly, WordPress.org is the home for WordPress software, whereas WordPress.com is a website builder with WordPress core. WordPress.com was founded by Matt Mullenweg, who is also the co-founder of WordPress.org. Additionally, the name WordPress is a registered trademark of the WordPress Foundation established by Matt Mullenweg. Because of the same name and the same founder, people often confuse between the two.
Secondly, using a web hosting for WordPress.org and using WordPress.com introduces different levels of controls, advantages, and disadvantages over the management and customization of a website.
If you register for a web hosting service like BlueHost and install WordPress.org, you will actually create a self-hosted WordPress blog. Owners of self-hosted blogs have the complete freedom to customize their website and install any tools they want. They also have full access to the website files and make any changes. However, it is entirely up to the owners to maintain the site.
WordPress.com, on the other hand, provides all the necessary tools for a hosted WordPress website. It means that it provides less freedom for people to configure the site, especially those who want to access the underlying structure entirely. The advantage of using WordPress.com is that you don’t have to take care of some management parts for your site or find a web hosting service yourself. WordPress.com will help you with that.
Another thing you might need to consider is the difference in prices. WordPress.com offers a free plan. However, unless you invest money in the business one, which costs $25/month (billed annually), you merely have the freedom to do anything. In this case, starting a self-hosted WordPress blog is a lot cheaper.
Ultimately, it all depends on how much money you are willing to pay and the level of control you want over your blog.
If you are a complete beginner and have no technical background, we still recommend starting a self-hosted WordPress blog for the complete control and the low upfront cost. If you get stuck, you can always search for solutions on the internet or contact the web hosting services for help. You can also contact us, and we will try to help you out as much as possible.
4. Bring your blog online
To get your blog online, first, you need to find a web hosting service. A web hosting service is a platform that helps put a website on the internet and make it available and accessible online.
If you decide to register for WordPress.com, you don’t need to find a web hosting service since WordPress.com will take care of this process for you.
For a self-hosted WordPress blog, BlueHost is one of the best choices in terms of cost, performance, and support. It is also officially recommended by WordPress themselves as one of the best hosting services.
Now, Let’s get your blog online.
Step 1: Go to BlueHost

Click the “Get Started Now” button to start signing up for BlueHost.
Step 2: Pick a plan
BlueHost offers 4 plans, starting from $3.95/month up to $13.95/month, billed triennially. The price would be $5.95/month up to $16.95/month if billed annually. Don’t hesitate and pick the first one. The basic plan offers everything you need to start a professional blog. If you want to upgrade to have more spaces or additional features like marketing offers or SpamExperts, you can always do it later.

Step 3: Enter your domain name
The next step is to enter your domain name. If you already own one, BlueHost provides the ability to transfer that domain to your BlueHost account so you can easily manage it later. Just type in that domain name in the right box, and click “Next.” Otherwise, Enter your domain name that you have come up with in the left box to check for availability.

If the domain name has already been taken, you can go back and type in another name or pick a suggested one by BlueHost.
If you haven’t decided on your domain name yet, click on “I’ll create my domain later.”
Step 4: Fill in the necessary information and register
First, enter all the account information as indicated by BlueHost or sign in with Google.

Next, select your account plan.

It is entirely up to you to select between the 12-month, 24-month, and 36-month package. The 36-month package gives you the lowest monthly fee. Additionally, the different price between paying 12-month and 36-month packages is only around $40 to $60. Still, going with a 12-month package might be the best option as it costs you the least amount of money upfront.
It is also worth mentioning that BlueHost offers a 30-day money-back guarantee. So, you can try it out for 30 days to see whether blogging suits you or not.

For the package extras section, you can uncheck all of them except Domain Privacy + Protection. The feature will mask your personal information from the Whois database and protect you from spammers or unwanted solicitation. You can always add other features like Codeguard Basic or BlueHost SEO Tools Start later if you feel the need to use them.
Finally, fill out your payment information and register for BlueHost.

Step 5: Create your account
This step is pretty straightforward. Click the “Create your account button,” enter your password, and you are all set.

From now on, whenever you want to log in to BlueHost, just use your domain name and the password you just set.
Step 6: Set up WordPress
The first time you log in to your BlueHost account, you will be asked to follow a simple setup process. The purpose of this process is to set up some basic information and pages for your website.

You can click “Skip this step” to head to your main BlueHost dashboard. Whether you choose to follow the process or not, it doesn’t make much of a difference besides some basic initial setup. Again, you can always do this stuff later.
Step 7: Get your blog online
You can immediately make your blog go live by clicking the “Launch My Site” button near the top right corner. You can also change your site’s status back to “Coming Soon” in the WordPress settings at any time.

To access your WordPress dashboard and start customizing your site, click “WordPress” next to the “Launch My Site” button.
5. Design your blog
Before designing your blog, access your WordPress dashboard, click around, and start familiarizing yourself with various tabs on the left side.

- Dashboard: gives you an overview of your site, news, and updates on WordPress and various tools.
- Jetpack: a tool that helps with your site performance, traffic growth, and security.
- Posts: the place you manage all your blog posts, categories, and tags.
- Media: contains images that have been imported into WordPress.
- Pages: manage your site’s pages.
- Comments: contain all comments that have been posted on your site.
- OptinMonster and WPForms: tools that help you build sign-up forms to collect emails for your blog.
- Appearance: customize the look and feel of your blog. Your site’s general layout and style are often controlled by themes that can be found by clicking the Appearance tab. There are many themes in WordPress (including free or paid themes) to choose from. They are suitable for different purposes like blogging, education, food & drink, news, e-commerce, and more. It is important to note that your theme only affects your site’s general appearance, not your content (Posts, Pages, Media, etc.). You can freely try out any themes and swap them out with a different one without worrying about breaking your site.
- Plugins: manage all the tools you have installed. People also use the word “plugin“ to refer to a tool or software that can be installed into WordPress.
- Users: contain information about who has logged into your site.
- Tools: contain some general tools to import, export your site, or your personal data.
- Settings: configure some general information about your site, including Site Title, Tagline, Date Format, Time Format, etc.
To start designing the general layout and style of your blog, simply click on the “Appearance” tab, then click “Themes.”

Click “Add New” on the top left corner to bring up the entire theme library. Just choose the one you love but don’t get too hung up though. You can always go back here and change your theme later.

You can type in your domain name in your web browser to have a look at your blog.
A theme also comes with its own customization options. Click the “Appearance” tab and then click “Customize” to start customizing your selected theme.
A new panel will be brought up. Below is the customization panel for the Twenty Twenty theme.

- Site identity: gives you the ability to upload your site’s logo and icon. You can also change your site title and tagline here.
- Colors: change the background color and the primary color of your theme.
- Theme Options: allow you to show the search icon in your site’s header bar and show the author bio of your posts.
- Cover Template: control the overlay background color, overlay text color, and overlay opacity.
- Background Image: upload a background image for your site.
- Menus: contain the settings for all of your site’s menus and their locations.
- Content Options: control the settings for your post details and the featured images. Featured images usually appear at the top of a post or page.
- Widgets: customize the site’s footer. For example, you can add quick links, recent posts, recent comments to the footer.
- Homepage Settings: choose what to display on the homepage of your site. It can be reverse-chronological-ordered posts or a static page.
- Additional CSS: an advanced option to further customize the appearance and the layout of your site. This tab might be suitable for tech-savvy people only.
One of the fastest and most elegant themes is Astra (totally free). It provides many functionalities to customize your blog that looks good on both mobile and desktop devices. Astra also provides its own gallery of pages like the home page, about-us page, contact page, and product page that you can import to your blog with just a click.

Using themes is a very powerful way to design your blog. However, because their purpose is to give you the quickest and easiest way to customize the general layout and style of the site, they can be limited sometimes.
If you wish to have complete control over every bit of your blog’s appearance, Elementor might be able to help you achieve that.

Elementor is a free WordPress drag-and-drog page builder that lets you create a beautiful WordPress website in a matter of minutes. If you want to get started with Elementor, check it out at building your site with Elementor.
6. Set up your blog for success
Before start writing and publishing your blog content, there are a few key factors that you should go through so you can increase your chance of success.
6.1. Site tittle and tagline
A site title is the name of a site. It usually appears at the top left corner (or middle top) of every site’s pages if no logo is specified. It also appears in web browser tabs.

A tagline is the description of your site. It should be short, memorable, and describe your site’s purpose.

Together, the site title and the tagline serve as the introduction of your blog for readers. They are also important factors that search engines pay close attention to better understand your site.
Make sure that you have set your site title and tagline by clicking on the “Settings” tab, then click “General”.

6.2. Site logo and icon
For a similar purpose to the site title or tagline, your site’s logo and icon are also worth paying attention to.
Canva is one of the few websites that let you create beautiful logos for free. Simply sign up for Canva, go to the home page, click “Create a design” in the top right corner, and then select “logo” to start designing your own logo.
After finishing your site logo and icon, make sure to go to “Appearance,” select “Customize,” and set them in the “Site Identity” tab of your current theme.

6.3. Site visibility
You can change your site’s visibility by clicking on the “Settings” tab. Next, select “General”, scroll down to the bottom of the page and toggle the line that says “Bluehost Coming Soon Page.” Turning this off will allow everyone to access and read your site’s content.

If your blog is ready to be indexed by search engines so everyone can search for, click on the “Settings” tab, and select “Reading.” Make sure that you leave the “Discourage search engines from indexing this site” box unchecked.

6.4. SSL certificate
SSL stands for Secure Sockets Layer, a technology that secures the internet connection and protects user data. An SSL certificate determines that a website is secured and safe for users to visit. If your blog doesn’t have an SSL certificate, visitors might get a warning stating that the connection is not private and vulnerable to attackers.
To check if an SSL certificate is installed on your blog, you can look at the address bar. If your blog is secured, the URL will begin with HTTPS instead of HTTP. You can also click the lock icon to validate this.

The tool below will show you the general SSL certificate information of your site.
By default, if you purchase a hosting plan from BlueHost, an SSL certificate will be automatically installed on your site. Therefore, you don’t need to do anything.
If, by any chance, the SSL certificate is missing, open your BlueHost dashboard, click on the “My Sites” tab, then click “Security.” Make sure that the “Free SSL Certificate” has been turned on. You can also contact BlueHost to address the issue.

6.5. Post links
It is recommended that your post links should be short and easy to understand both by readers and search engines.
By default, your blog’s link structure might not be SEO-friendly (SEO stands for Search Engine Optimization. More information on SEO will be addressed later). To change this structure, go to the “Settings” tab of your WordPress dashboard, then access the “Permalinks” section.

Change your permalinks to “Post name: domainname/samplepost” variant.
6.6. Privacy policy
As any standard website, you need to create a Privacy-Policy page and similar legal pages like Terms Of Conditions or Disclaimer for your blog. The purpose of these pages is to inform users which data you collect, ads you display, affiliate links you use, etc. You might also need to create these pages to follow national or international laws. In any case, creating these pages ensures that you don’t run into any law-related troubles later.
Don’t worry! You don’t need to write down this stuff yourself. To save you from the trouble creating these pages, go to Policy Maker, answer a few questions. It will automatically generate the content of these pages for you.
Now, go to the “Settings” tab and click “Privacy.”

If you already have a Privacy-Policy page, just select it from the drop-down menu. Otherwise, click “Create New Page” and paste the content you have generated from Policy Maker into the current page editor.

Then, hit “Publish” on the top right corner. You now have your own Privacy-Policy page.
For other legal pages, you can go to the “Pages” tab and click “Add New” to create them.

For more information about the WordPress page editor, check out section 9: Create your first blog post and publish it.
6.7. Sharing
In the “Sharing” section of the “Settings” tab, you can set the Twitter Site Tag for your blog. This tag will appear when someone shares a post from your blog on Twitter. You can set this to your own name or your domain name.

6.8. SEO
SEO is one of the most important aspects when it comes to building a successful blog. Without good SEO, your blog will not be able to rank high in the search results, bringing in fewer readers.
So, what is SEO anyway?
SEO stands for Search Engine Optimization, which is a set of techniques and practices aiming to increase the amount of traffic to your site through organic traffic. Organic traffic happens when people search for something and end up landing on your site (also called unpaid traffic or natural traffic).
You can read the official guide of Google on SEO here: Search Engine Optimization (SEO) Starter Guide.
It must be pointed out that SEO only serves as a method to make your site easier to rank high in the search results. Google and any search engines value your content much higher than, let say, a site with good SEO but poor content. So, focus on writing good content first and do SEO stuff later.
You can start setting up some basic SEO settings for your blog by installing the Yoast SEO plugin – a free and comprehensive SEO tool for WordPress sites.
Click on the “Plugins” tab, and select “Add New.” Enter “Yoast SEO” in the search bar and hit enter.

Yoast SEO should appear as the first result. Click “Install Now” to install the plugin for your blog. Next, click on “Activate” to activate it.
A new “SEO” tab will be added to the left panel of your WordPress dashboard. Click on it to open up the Yoast SEO window. You can start by clicking on “Configuration wizard” to quickly set up basic SEO settings for your blog.

The problem section allows you to identify issues that affect the SEO of your blog.

You can also select the “Tools” tab and click on “Start processing and speed up your site now” to let the plugin create an index of your site’s SEO data. It might take a few minutes for this process, so be patient.

For the complete rundown on Yoast SEO, click the link here: Configuration guide for Yoast SEO.
SEO is a complex topic as search engines change their algorithm almost every day to ensure that they can find the most relevant and the best content for their users. Also, for the purpose of a short and easy-to-understand guide on starting a new blog, we will not try to go into too much detail about the topic here.
6.9. Site speed
Your site speed is another factor you should pay attention to. A website that renders slowly can negatively affect the user experience and drive visitors away. Thus, It might indirectly affect your site ranking on search engines.
Google offers Google PageSpeed Insights, a website that can help you check your site speed. Additionally, it provides you with issues that need to be addressed to speed up your site. Just enter your site URL in the blank field and hit “Analyze” to start the process.

The same thing can be done using GTmetrix.
You should regularly check your site speed to fix your site problems as soon as possible. It helps avoid a bad experience for your visitors.
If you’re just getting started, your blog will most likely score a high point in speed check tools. However, as you install more plugins, import more images, or use a slow theme, you can start to see a decrease in your site speed score. In this case, installing the LiteSpeed Cache plugin might be a solution.
LiteSpeed Cache is a comprehensive acceleration plugin that provides many site speed optimization features such as caching, image optimization, database cleaner, etc.
If you don’t feel the need to use the default installed plugins like Jetpack, OptinMonster, or WPForm, go to the “Plugins” tab, click the “Deactivate” button, then click “Remove” to remove them from your WordPress site. You can always install these plugins again like any other.

You can read more about the topic here: Improve your site speed with LiteSpeed Cache plugin.
6.10. Blog backup
BlueHost and WordPress, like any other services and software, can be vulnerable to server crashes, hacking, theme, or plugin issues, which can cause you to lose your content, or even worse, lose your entire blog. To avoid the worst things ever to happen, using the UpdraftPlus plugin to backup your site is a good option.
UpdraftPlus plugin is the most popular manual and scheduled backup plugin, which provides the ability to backup your entire data into the cloud and restore later with just a click. With this tool, you don’t need to worry about making a mistake or losing your content. You can always rewind to a backup point at any time.
6.11. Email list
Email list refers to a list of emails that accepts to receive marketing materials from your blog. You can think of it as a list of your regular readers. An email is added to your email list when a person enters their email address into one of your signup forms.
Growing your email list is one of the most important factors to consider. People who subscribe to your email list are often the most interested in your content and regularly visit your blog. They are also much more likely to take action on your blog than regular visitors (for example, buy your products or click your affiliate links).
It is recommended that you start building an email list for your blog as soon as possible.
To start, first, you need to sign up for an email marketing service like ConvertKit. It helps you organize email addresses, create newsletters, and automatically send them to your subscribers. Most of the email marketing services offer a free plan if you have less than 1000 subscribers.
Next, install a signup form plugin to collect email addresses (also known as email leads). You can install any signup-form plugins as long as it supports the integration with the email marketing service that you choose. Some of the most popular plugins in this field are OptinMonster, Contact Form 7 (free), Contact Form by WPForms, and Ninja Forms.
For more information on the integration between ConvertKit and WordPress, visit the link: Integrating ConvertKit with WordPress.
6.12. Other plugins
Below are some other extremely helpful plugins that you can install:
- MonsterInsights – a Google Analytics Plugin for WordPress that helps you track, analyze, and optimize your website traffic.
- WooCommerce – create your online store in minutes with Product, Cart, and Checkout pages and secure payments.
- Smush – Compress and optimize images to boost page speed.
It might be tempting to install many plugins so you can manage your blog easier. However, you should consider the trade-off between your blog performance and the value these plugins bring you. Installing many of them can add high overhead costs for your blog, making it load slower. Make sure to check the site performance after installing a plugin and remove unnecessary ones if possible.
7. Decide effective monetization strategies for your blog
Monetization is the process of making money from a product or service. There are numerous ways you can choose to start monetizing your blog.
- Displaying ads – Selling advertising space is one of the easiest ways to start making money from your blog. You can sign up for Google AdSense, an advertising platform created by Google to start displaying ads. You can also consider joining a higher-paid advertising platform like Mediavine or AdThrive if your blog has a large number of visitors (at least several thousands of visitors per month).
- Sponsored posts – You can try contacting a relevant brand with your blog content and ask them if they want to be featured on one of your posts. Sponsored posts are a really good way to make decent money, which you can earn up to several thousand dollars per post depending on your blog traffic.
- Affiliate Marketing – Probably the most popular form to make money when it comes to blogging. It is the process of promoting products or services to earn commissions when someone buys them through your affiliate links. A few popular affiliate programs are Amazon Associates and ClickBank marketplace.
- Membership exclusive content – If your blog has good and unique content, you can consider limiting visitors to read only a certain part of a blog post. Only when they purchase a membership, they will be able to read the full content. Medium is a good reference for this monetization model. Offering exclusive content is probably the hardest method to make money from your blog as few people are willing to pay to read online articles. However, if you manage to implement this model successfully, the reward can be enormous.
- Selling your products – If you have an established fan base, you can think of selling some of your own products like books, EBooks, or other physical products.
Those are some of the most common methods to make money from your blog. If you are not sure which ones to choose, consider researching this topic. For example, suppose you are starting a food blog. Search for food bloggers by typing “top food bloggers” and looking at what they are doing and promoting. Pinch of Yum makes money from her food blog by displaying ads. She also has Amazon affiliate links in each of her posts.

Before writing any post, think about which monetization strategies you would be using and how they would affect the content or the layout of the post.
Please keep in mind that you should always prioritize your content over anything else. If one of your posts has a lot of visitors, and both ads and affiliate links are displayed, turning off ads for that post to avoid distracting the reading experience is a good idea.
If you would like to learn more about this topic, visit The definitive guide to make money blogging.
8. Find blog post ideas
Chances are if you are just getting started, you don’t exactly know what to write about. Don’t worry! We’ve all been there.
A blog post idea doesn’t need to be completely new. In fact, you should opt in to write something that others have written about in the beginning. The benefit of this is that you can learn from their posts, how they structure the content, what problems they tackle, what their style is, and how they make money from it. It doesn’t mean that you should copy their content, and you absolutely shouldn’t. Learning from others and finding a way to make your post more engaging or more comprehensive is what you should do. At the end of the day, anyone learns from someone, right?
You can also ask your readers what they want to know or which problems they are facing. This technique not only gives you ideas to write about but also a very good way to build a loyal community.
Check out The ultimate guide to come up with infinite blog post ideas if you ever get stuck to find amazing blog post ideas.
9. Create your first blog post and publish it
To create your blog post, click on the “Posts” tab and click “Add New”.

A WordPress block editor will pop up.

The WordPress block editor (also known as the Gutenberg editor) divide your content into multiple blocks, thus allowing you to create media-rich posts and pages. You can easily add, manage, arrange, and rearrange your content in any way you want.
- Post Title: The title of your blog post.
- Blocks tab: Provides all blocks you can add to your post. Some of the most common blocks are paragraph, heading, image, and list.
- Patterns tab: Provides some ready-made block groups.
- Content structure: Helps you see information about the post’s content, such as the number of words, headings, paragraphs, and blocks. You can also have a look at your document outline there.
- List view: See which blocks you have added into the post.
- Preview button: See what your blog post looks like on various devices.
- Document tab: Edit general information, including the blog’s visibility, slug, excerpt. You can also allow for comments, pingbacks, and trackbacks in this tab.
- Block tab: Edit some of the settings of the block you are currently selecting.
Now, it’s up to you to write the content. Once you’ve done writing your post, click “Publish” on the top right corner to publish it. You can also click “Save Draft” to save your post as a draft and publish it later.
You can learn more about the Guttenberg editor by clicking the link here: Introduce to the Guttenberg Editor.
10. Promote your blog and start building your audience
Blogging, like any other business, it’s a fierce competition. Starting a beautiful blog and writing outstanding content is not enough to get you ahead. You cannot just publish a blog post and hope that people will flock in to read it.
To get readers into your blog, promotion is the key, and it takes time, especially if you are a beginner.
10.1. Write good SEO blog posts
With search engines constantly finding fresh, engaging content for people, this is actually an opportunity for you to get discovered. Additionally, if you rank high up on search engines, you can regularly attract tons of visitors to your blog without spending a fortune on advertising.
Good SEO can greatly benefit your site in the long term. However, doing SEO is not an easy task. Furthermore, even if your site has good SEO, it takes a long time to see some results.
Here are some tips for a good SEO blog post.
Post Title

The title of your post should accurately describe your post content. It might sound a little bit obvious, but it is something that people often make a mistake.
The blog title is the first thing searchers and search engines take into consideration when determining the relevancy of your content. For this reason, many bloggers try to stuff in many keywords or even create misleading titles to get visitors to their blog. Doing this will not only hurt your reader experience but also hurt your site ranking.
Search engines like Google nowadays are smart enough (and they get smarter each day passes) to determine whether your title and content are relevant or not and whether you are trying to trick them into ranking your content higher. So, avoid that at all costs.
Description
Search engines often do a good job of choosing the most relevant section of your post to display in search results. However, providing a meta description is always a good practice.
The meta description should accurately provide a summary of your blog post for readers as well as search engines. It is what appears below your post title in search results (known as snippets) in case search engines cannot find a good section of content to display.

Try to summarize your post as descriptive and engaging as possible. Again, don’t try to fill your description with keywords or irrelevant information.
If you are using a plugin like Yoast SEO, you can click on “Edit Snippet” and start entering the post’s meta description.

Headings
You should break down your content into sections with heading tags to create an easy-to-follow structure.

Search engines look at these heading tags to ensure that users can easily navigate your post and determine which parts are more important than others.
You shouldn’t try to use too many headers as a way to include keywords. They should always come in as naturally as possible.
Post URL
Search engines also look at the URL of your blog post as a factor to determine what it is about.

Your post URL should be simple, friendly, and relevant to the post’s content.
Keywords
A blog post should focus on one or two long-tail keywords. They are long phrases that are more specific and relevant to the post content.
Users often search by long phrases instead of short ones, such as “How to start an online business” instead of “online business.”
Targeting long-tail keywords means that visitors that end up on your site is more likely your target audience.
You should try to incorporate these keywords in your post title, description, headers, or post URL. But again, don’t force it.
Categories
Assigning your post into the right categories helps search engines understand the hierarchy of your blog. WordPress also uses categories to display related content to your visitors.

Ensure that all your posts are assigned into specific categories. That way, it is easier to reach them through navigation around on your blog. Readers are also comfortable going from a blog post to a more general topic and vice versa.
Images
Search engines don’t always understand the meaning of images presented in your post. This is where the filename and the “alt” attribute play a huge role in helping search engines better define your images.

You might be wondering what an “alt” attribute is. It is the text which appears instead of your image when the image is not done loading (or cannot load).
Similar to other parts of SEO, filenames and “alt” attributes should be accurate and descriptive.
Link text
When linking to other sites or other parts of your websites, you shouldn’t just paste the link into your blog post. The link should appear as a link text which appropriately describes the content of the page you are linking to.
For example, when linking to the Google SEO official page, use a phrase like “The official Google SEO guide” and put the link in it. Avoiding lengthy or generic link text like “Click here” or “this article” is a good practice recommended by Google.
In conclusion, you should treat search engines like humans. If you deliver good, engaging, clear structure, and relevant content to your readers, it means that you deliver the same thing to search engines.
You can also read the full guide on blog SEO here: How to Search Engine Optimize Your Blog Content.
10.2. Utilize the power of social media
Social media platforms like Facebook, Twitter, Instagram, or Pinterest are great places to announce your new content and connect with relevant audiences. They are free to use and have a massive user base.
In the beginning, you should only try to focus on one or two social media platforms. Only when you have a good growth rate on those platforms, consider acquiring a new audience on others.
Before choosing suitable social platforms to put your effort into, you should research bloggers in your niche and find out which platforms they are most active on. Also, remember to pay close attention to their social content and try to replicate their success.

Anyway, on whichever platforms that you choose, try to post your content regularly. But, at the same time, try not to be too spammy with advertising content. A good rule of thumb is that 80% of your post should aim to add value to your audience. The remaining 20% is used to promote your brand, business, or products.
10.3. Advertise your blog
Since it could take a long time for your SEO to kick in and do its job, it might be worthwhile to invest a little bit of money into advertising your blog. Paying for Ads campaign can help you gain exposure, thus creating the opportunity to promote your products or services with a wider audience.
The two most popular services to advertise your blog is Google Ads and Facebook Ads. They are vastly different in terms of user behaviors, ages, genders, and interests. Therefore, starting with one and expanding to the other later.
It is important to note that despite some claims, paying traffic doesn’t benefit your SEO rankings, at least in the case of Google. As noted in Google Search policy, it is committed to put users at its core and keep its search results as trustworthy as possible.
10.4. Grow your email list
People who sign up to receive newsletters from your site are the most enthusiastic ones about your content. They are more likely to share your blog with others and respond to your promotional efforts. For that reason, your current audience is much more valuable than any others, and they are the ones you should pay attention to the most.
Building your email list when you are just getting started might be an intimidating task. However, with the right strategies, you can grow your email list to a few hundred or thousand in no time.
One of the most common methods to collect email addresses is to put signup forms sparingly throughout your site. Your site header, footer, and sidebars might be the most appropriate places since they are the least distracting elements on your site. You can also try putting signup forms on the home page, about page, or contact page.

Placing the signup forms inside your post is another method that many bloggers apply. However, make sure that you don’t overuse them as putting them on your post severely interferes with the user experience.
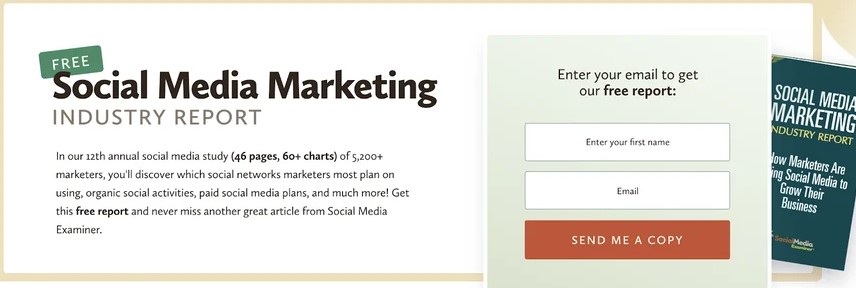
A technique that you can implement to minimize that problem and also increase your chance of collecting email leads is to provide a benefit for people who sign up. Don’t just use the form that says, “Sign up to receive notifications when the latest articles come out.” Use a form that gives readers a clear benefit like “Want to receive our latest course on Facebook marketing? Enter your email below.” Signup forms like those are also called lead magnets.
If you think static signup forms are not enough, popup forms might worth a try. They are a great way to grab visitor’s attention and generally have a higher conversion rate (the percentage of visitors completes a specific goal) than normal signup forms.

Still, be sure to display them in the right places and at the proper time to avoid distracting the experience of visitors navigating on your blog.
10.5. Engage with your readers
Besides promoting, engaging with your audience is a must if you want to build a loyal community. When your readers leave a comment or ask a question either on your blog or your social page, try to reply to them as soon as possible. In this way, your readers feel a sense of connection, and they will have the motivation to come back to read more and even convert into loyal customers.
When engaging with your readers, be sure that you communicate confidently. It will prove that you are knowledgeable about your topic. Don’t be afraid to make mistakes either. Blogging is ultimately all about your personal experience, and your readers understand that.
10.6. Engage with other bloggers
Think of bloggers within your niche as your friends rather than your enemies. Each blogger has their own fan base, and they are always trying to broaden their audience size as much as possible. This is your opportunity to build relationships and help each other spread content.
Commenting on other blogs is a good way to start building friendships. Note that don’t provide the link to your site when commenting on other blogs. You don’t want others to think that you are trying to promote your own content. Answer them as their fan, not as a spammer or an advertiser.
11. Turn your blog into a business
Now that you have a pretty solid understanding of how to start a blog as well as how to make money from it. Let’s turn it into a business.
Start by creating a content strategy.
A content strategy is a suitable plan for the creation and publication of your blog. Think of it as a strategy for the long-term publishing activity of your blog posts. Having a content strategy is important in helping you grow your blog in the right direction.
To define your content strategy, you need to make sure that you have a clear goal for your blog.
As mentioned earlier, a clear goal is an important factor in assessing how successful your blog is. For example, the primary goal of this blog site is to try to provide you with knowledge about online businesses and how to build them cleverly and successfully.
Once you determine your blog goal, you will also need to specify an objective for your blog posts. For example, this blog post has a couple of objectives. Firstly, it aims at providing you with a comprehensive step-by-step guide to start a blog (the content objective). Secondly, it aims to get you to click on affiliate links (the main objective). Finally, it aims to collect your email addresses (the sub-objective). You can have more or fewer objectives for a blog post. However, remember to tailor your content for a specific objective only.
Next, determine your target audience. For instance, if you start a blog about traveling, but you promote it for people who love playing games, it will likely not work.
Understanding your audience helps you create and deliver your content to the right readers. Sometimes, your target audience might not be that obvious. Therefore, consider conducting market research for your blog. You can use tools like Facebook Audience Insights or Buyer Persona to do that.
A technique you can use to create your content strategy is to create a content pillar and write your blog posts around it. For example, “starting a blog” can act as a content pillar. Some blog posts under this pillar can be “How to start a blog and make money,” “How to create a beautiful blog,” “How to write a blog post fast,” etc. In short, a content pillar helps keep your blog focused and help you generate content ideas.
You can read more about content marketing plans at How to Develop a Content Strategy.
Next, create an editorial calendar.
An editorial calendar is a regular publishing schedule that will keep you organized and gradually help you create a writing habit. By setting an editorial calendar, you set yourself and also your readers the expectations of when your new posts will be coming out and what they will be about. It is essentially a way to create consistency, and just like any business, consistency is the key to your success.
There are many tools that can help you easily create an editorial calendar. Trello is one of the few free services which will not only help you create your schedule but also help organize your work and manage your team in case you have one.
First, signing up for Trello and go to your home page.

Select “Create a board” to get started. A board is an area that helps you manage all your work. You can also choose a ready-made template to quickly set up your board.
There will be a lot of stuff popping up. However, for now, you only need to pay attention to lists, cards, and power-ups.

- Lists: A list is a collection of ideas. They can also represent different stages of your work. You can always add a new list to your board by clicking “Add another list.”
- Cards: A card contains information about an idea. You can add a new card to a list by clicking “Add a card.” To include more details to the card, simply click on the card you have created.
- Power-ups: A power-up is a plugin that adds more functionality to your board, such as Callendar, Map, Chat, etc. You can only add one power-up in the free version of Trello. To add a power-up to your board, simply click on the “Show menu” button in the top right corner, then click Power-Ups. Select a power-up that you want to add to the board and click “Add.”
For blogging, a typical Trello board will contain three lists: To Do, Doing, and Done. Dividing your board into three lists helps you better keep track of all of your work.

The To-Do list will contain all the posts you are planning to write and publish. In the example image above, the list contains some cards like “How to start blogging” or “What is a blog.”
The cards’ description should include important factors, such as the targeted keywords, categories, related resources, and some notes if you wish. You can label the card to indicate how important it is. Also, set the due date to keep track of your schedule.

The Doing list will contain posts that you are currently working on. Simply drag a card from the To-Do list to a Doing list.
Similarly, The Done list includes posts which you have done writing.
If you are the owner of a team, consider adding another list named “In Review” between the “Doing” and “Done” list. That way, you have a chance to review blog posts before actually publishing them.
To better visualize your publishing schedule, you can add the “Schedule” power-up to your board.

After installing the power-up, just click on “Calendar” near the “Show Menu” button. It will let you see all your work in a calendar manner.

For the complete Trello guide, visit the link: Trello 101.
That’s pretty much everything you need to create an editorial calendar for your blog.
Alternatively, you can use Google Sheets and Google Calendar to keep track of your writing routine.
Finally, treat your blog like a real business.
It is not redundant to stress this again and again. If you want to be successful with blogging, treating your blog like a real business is indispensable.
Before you write a blog post, set up necessary tools, do research, determine your goal, plan out what you will be writing about, which keywords you will be using, how competitive those keywords are, which monetization method you will be using, and the list goes on. In that way, you have the opportunity to analyze the result of your post, understand what you do wrong and right, learn from your failure, and make it better.
You should also try to build your own brand. It isn’t in your outstanding domain name or your beautiful logo. It’s in the unique value you will bring to your readers. Try to create the difference between you and other bloggers. Find what you can do better than others, and focus on it.
Additionally, focus on building credibility as much as possible. You should understand the limitations of what you can do and don’t promise what you cannot do. It will be a vital weapon for your evergreen success.
Conclusion
It can feel a bit overwhelming if it’s your first time starting a blog. There are a lot of things to do and learn.
But like anything in the world, consistency is the key. If you invest in enough time and effort, once day, blogging can change your life for the better.
Remember to treat your blog like a real business. In that way, your success will come much sooner.
Useful Resources
- Blogs, Blogging, Blog Posts, And Bloggers: Have a general look at blogging and how to make money from it.
- How search engine works: Understanding what happens when you type something in Google Search can be a big advantage in keyword researching.
FAQs
What is a blog?
A blog is a frequent record of your experiences or opinions put online so people can find and read.
What is the difference between a blog and a website?
Many site owners include a blog page on their website to occasionally update the latest news on their products or services, thus creating the confusion between blogs and websites. Technically speaking, a blog is a website that is dedicated to blogging. It means that blog sites update content (news, posts, stories, etc.) more frequently and allow for a more dynamic interaction between readers and bloggers than a traditional website.
Do I need to be a great writer to become a successful blogger?
To be honest, if you have great writing skills, it will be a tremendous help for your blog. However, blogging is not like writing a wordy essay. It’s all about communicating. In fact, it is recommended by many top bloggers that you should write like you talk. People tend to feel more comfortable reading a post that flows naturally like a conversation. If you want to learn more about this topic, read here: You’re a Good Writer But Not a Good Blogger.
Do I need a technical background to start a blog?
Not at all. There are countless tutorials on the internet that help you start a blog like any professional blogger. Plugins provided on WordPress are also more than enough to help you become a successful blogger. When your blog is set up and running, the remaining work left for you is to write and deliver amazing content.
How do I pick the best domain name for my blog?
There are some tips to help you choose the best domain name:
• Choose a “.com” domain name if possible. “.com” is the most popular domain name extension. People also tend to trust websites that ended with “.com” than any other extensions.
• Keep the name short. A short domain name makes it more memorable and brandable.
• Avoid misspelled words unless it’s your intention. A misspelled domain name can make it harder for people to find your site, or even worse, can lead them to the wrong site.
• If the domain name you want has been taken, try to play with the words. Using synonyms or adding “the” or “a” to the beginning of the domain name might be good options.
Can I change my domain name later?
You can change it at any time. Simply buy a new domain name and connect it to your current hosting service.
How much time does it take to start making money from blogging?
Beginner bloggers usually start making a decent amount of money after 3 months or 6 months. It’s the time taken to get your name known and drive consistent traffic to your site.
How much money can a blogger make?
A blogger can make anywhere around a couple of hundred dollars at the beginning to hundreds of thousands of dollars a month when they are established. It takes time and effort to see a consistent stream of income to your blog, so be patient.
Which monetization method is the most profitable?
Generally speaking, there is not an obvious one that is more superior than the others. It depends on your niche and how effective a monetization strategy is used in each of your blog posts. Two of the most popular monetization strategies are displaying ads and affiliate marketing. They are easy to get started and can still bring you a decent amount of money if they are done right. When you become more well-known, selling courses and books are good options to make more money from your blog on top of the previous two methods.
How often should I publish a blog post?
As often as possible. Updating content regularly is a big plus factor for your site ranking. Successful bloggers create a new post at least weekly, and you should do that too.
What to do if I cannot find a suitable niche to choose?
Jot down every subject that you can think of and find a good balance between a profitable niche and a niche that you are passionate about. Before choosing a niche, ask yourself: Am I comfortable enough to learn and write about that niche? Can I keep writing about it for a long time? Is the niche popular? Is the niche easy to monetize? Can I compete with other bloggers in that same niche?
If all of the answers are yes, it’s the niche you should invest in.
The rightful owner of The Clever Business. I review & curate the leading suppliers so you don't waste time scouring the internet.


